
AI app builders promise fast custom portals, but fast doesn't matter if you can't trust what they create. With Zite, you can visually trace how data moved through every step and verify the app worked correctly before sharing it with a single client, rather than hoping the AI was right. Here’s the step-by-step process I used to build a custom client portal with Zite in 2026.
What is a client portal?
A client portal is a private, login-protected space where your clients can access their information, files, project updates, and communicate with your team. Think of it as a dedicated hub for each client relationship.
Why build a custom one? Building a custom client portal ensures it fits your specific workflows and works exactly the way your clients need to use it. When you use a generic client portal tool, you have to work within whatever layout and features it was designed for.
If you decide a custom portal is the right move, here are the main ways you can build one:
- Hire a developer: Expensive, time-consuming, and you're dependent on them for every change.
- Use a visual drag-and-drop builder: Easier, but limited if you need custom logic.
- Let AI build it from your description: Simply explain what you want and get a working app. This is the fastest option for most businesses.
Not all AI app builders work the same way. Many only generate rough prototypes that still need heavy debugging with code before they’re ready for real clients.
Zite is specifically designed to build production-ready business software, including client portals. The apps run on your real data and can be deployed to real users, with authentication, hosting, databases, and workflows handled out of the box.
In this guide, I’ll show you how non-technical users can build their own custom client portal with Zite.
What you'll need before starting
Prerequisites:
- Zite account: Create a free account or log in if you already have one.
- A clear picture of what clients need: What should they see? What actions should they take? What information do you need from them?
- Your branding assets (optional): Logo, brand colors, and fonts if you want the portal to match your website.
- Technical requirements: Just a browser and an internet connection. Zite runs in the web interface. You don’t need any special development environment.
- Time required: About 45–60 minutes for a fully functional portal. Zite builds the foundation in minutes. You'll spend the rest of the time configuring access, refining the interface, and testing.
How to build a client portal without code: 8 simple steps with Zite
Here’s my proven process for turning your portal idea into a live app using Zite in under an hour.
Step 1: Describe your portal
Log in to Zite and click Create, then select App from the dropdown.
In the prompt box, describe exactly what your client portal should do. Be specific about the pages, features, and user types.
For example:
"Build a client portal for my marketing agency. Clients should log in and see their project dashboard with current campaigns, milestones, and deadlines. They need to upload documents, view and download files I share with them, and see their invoice history. Include a form where they can send questions to our team."
Click Build it.
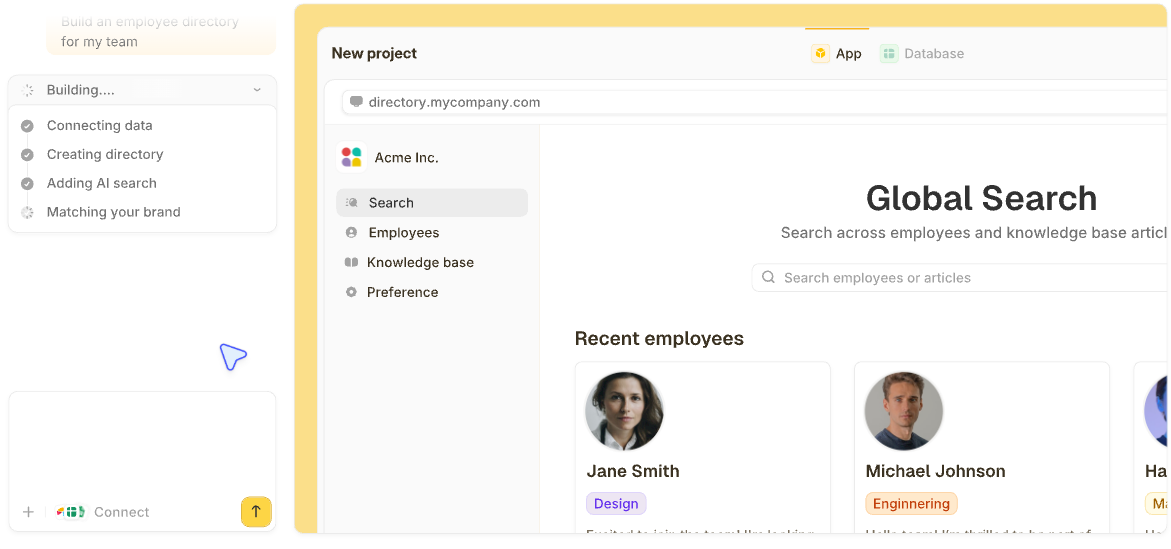
Zite reads your description and will start generating a working app with pages, forms, and database tables that match your requirements. You'll see a live preview immediately.
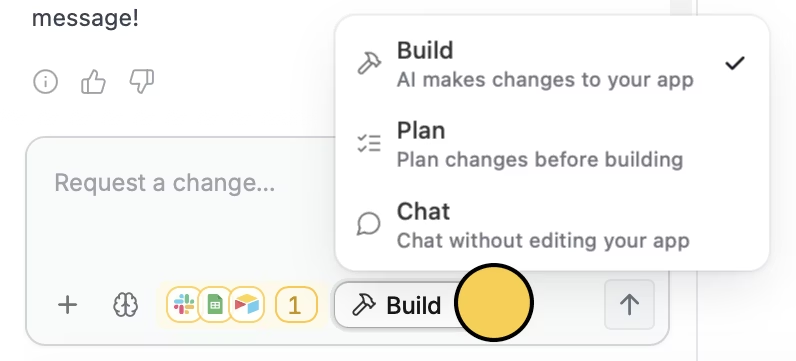
You don't have to start building right away. Zite has 3 Editor modes you can toggle on in the chat box:
- Build mode: The default mode when you’re building or updating the app.
- Plan mode: Creates a plan document summarizing what Zite will build, including scope, data, integrations, assumptions, and what’s out of scope. You can review and edit the plan before building.
- Chat mode: A read-only conversation where you can ask Zite questions and get suggestions about your app without changing it
Step 2: Configure your database
Your portal needs somewhere to store client data, files, and project information.
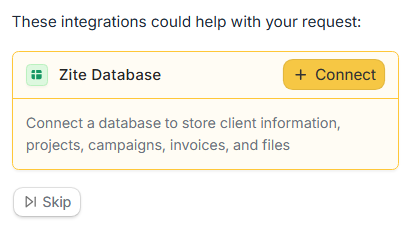
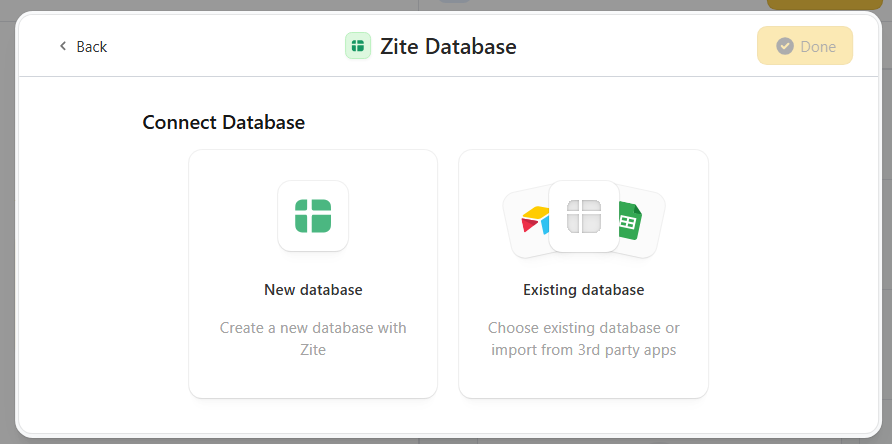
When Zite prompts you to set up a database, you have two options:
- New database: Zite auto-generates tables and fields based on your description. Best for starting fresh.
- Existing database: Choose an existing Zite database or import data from an external source like Airtable or Google Sheets if you already track client data there.
For most new portals, the built-in database is the simplest choice. Zite will automatically create the right tables and fields for your portal based on your description. You might see tables for clients, invoices, files, campaigns, and projects.
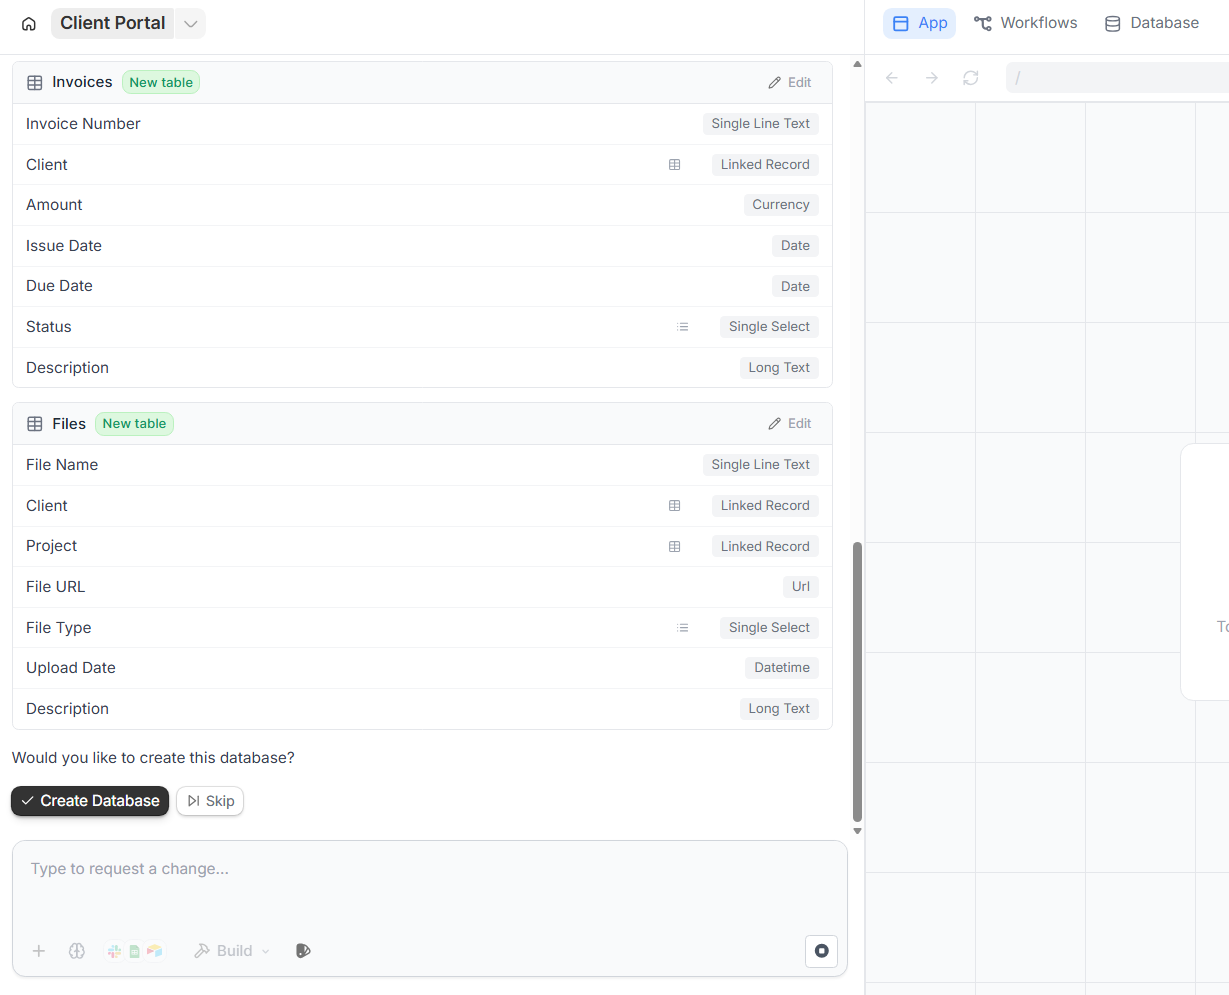
Add any missing fields or adjust names, then click Create Database.
Pro tip: You can always add fields later. Don't overthink the initial setup. Start with the essentials and expand as you learn what clients actually need.
Step 3: Set up client logins
Your clients are trusting you with their information, and you need to control who sees what.
In the chat box, tell Zite to add authentication.
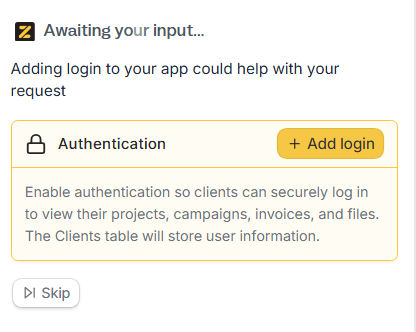
You’ll need to choose where to store users. Select Zite's built-in database and confirm the Clients table.
Zite supports passwordless Magic Links (clients get an email link to log in) and Google OAuth. For enterprise clients, SSO is available on higher plans.
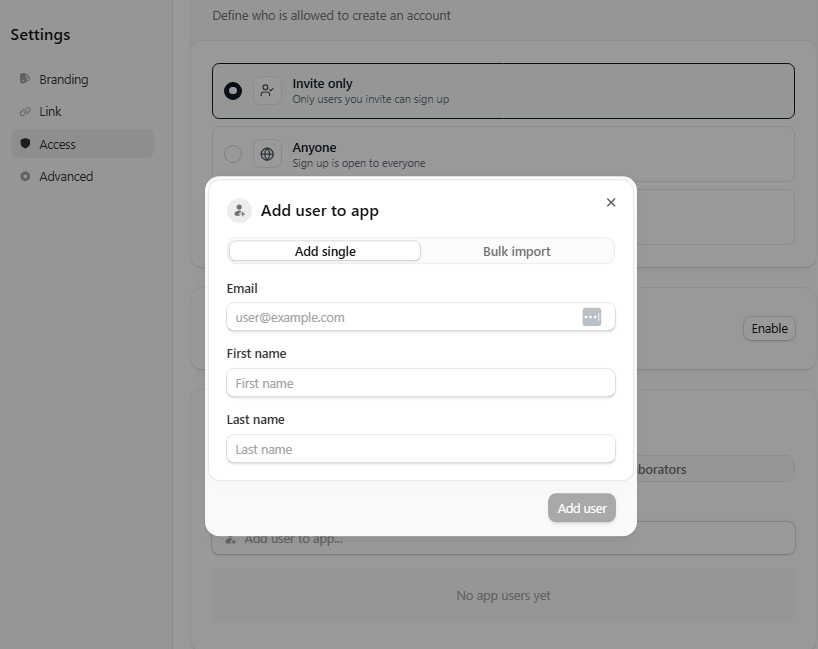
From the login tab, you can control who can sign up for your app:
- Anyone can sign up: Open registration (rarely what you want for a client portal)
- Invite only: You create accounts for clients manually (most common)
- Allowed domains: Only emails from specific domains can register

For client portals, invite-only usually makes sense for security. Only your clients get the link.
Pro tip: Set up a welcome email that triggers when you add a new client. Include their login link and a quick orientation on how to use the portal.
Step 4: Add role-based views
Not everyone should see everything. Your app needs an admin view so admins can see the data from all your clients, but each client should only see their own data.
Before I added admin and client views, I switched to Zite’s Plan mode to think through what the app should look like. It asked a few clarifying questions, like who needs access and what each user type should see, then turned that into a build plan.
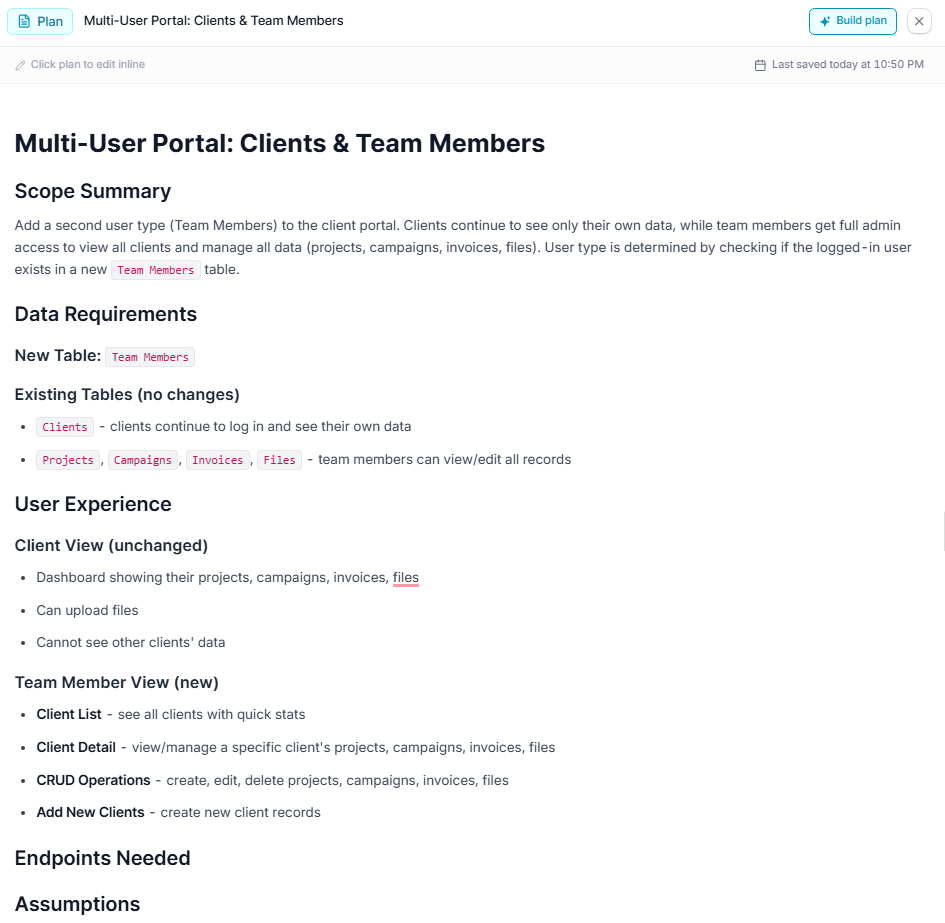
I edited a few details, and once it matched what I needed, I hit Build. Plan mode avoids wasting credits on rework by clarifying what to build upfront.
Step 5: Customize the user experience
Use Zite's chat box to describe the changes you want to make to the UI. You can also upload your logo or brand kit so the portal feels like an extension of your business.
You don't need prompts for every UI tweak. You can use:
- Visual edit tool: Change typography, color palette, text, and other elements directly. With AI edit, you can target a specific element and tell Zite what to change about it.
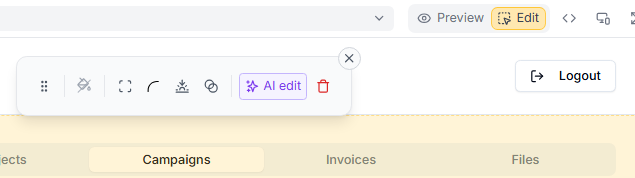
- Choose a theme: Click the paintbrush icon in the chat box to change the app’s theme. This will swap fonts or adjust your color scheme across the entire portal at once.

Step 6: Add workflows to the portal
Workflows are the backend logic that powers your Zite app, so you will already see some pre-built workflows for actions such as creating or updating records when you open the workflow tab.
Each workflow appears as a step-by-step flowchart. You can follow the logic visually to understand exactly how your app works behind the scenes.
You can also create new workflows by describing what you want the app to do.
For example, you can use this prompt to send messages to Slack when clients upload a document: “Send me a Slack message in #client-updates when any client uploads a document."
Because that workflow needs Slack access, Zite will first prompt you to connect your Slack account. Once connected, it generates the workflow automatically. You can then open the Workflows tab to review the logic visually and confirm everything looks correct.
If functionality breaks, such as a client saying they never received an upload confirmation, you can open the workflow’s run history and trace exactly what happened, step by step, before asking Zite to fix it.
Step 7: Test from both sides
Before inviting real clients, test thoroughly.
As a client:
- Create a test client account
- Log in and navigate the portal
- Upload a document
- Send a message
- Check that you only see what clients should see
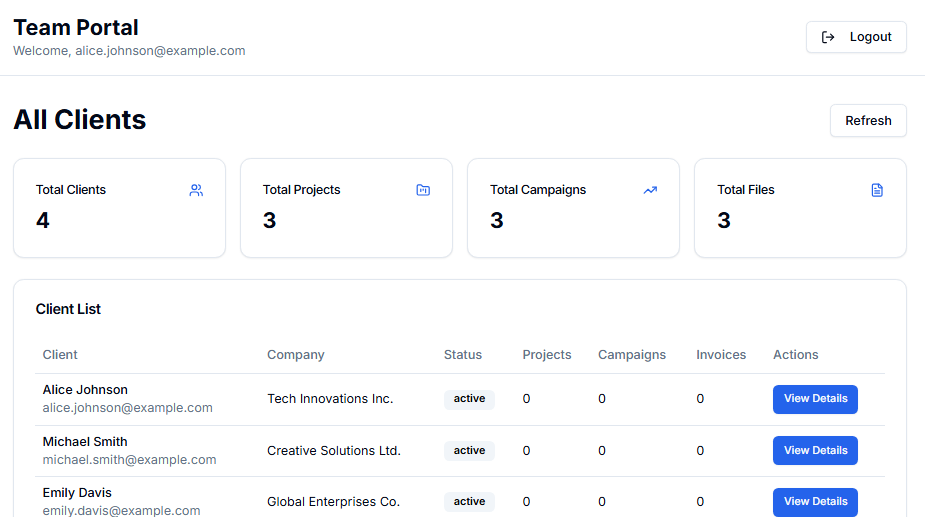
As your team:
- Verify you can see all client data
- Update a project status and confirm the client notification fires
- Check that internal notes stay hidden from the client's view
- Test the response workflow for client messages
Fix anything that feels clunky or confusing. Small friction points add up.
Step 8: Launch and invite clients
Once your portal is tested and working, you are ready to launch it and invite clients.
In the Zite editor, click Publish, enable Share to the web, then hit the Publish button.
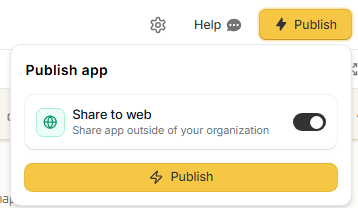
Most apps default to internal publishing so people in your organization can access them automatically. Sharing the app to the web lets external users (like clients) log in and gives you the option to define who is allowed to access the app:
- Invite only
- Anyone with the link
- Only allowed domains
A client portal is the share to the web + invite only scenario because you want the app to be reachable from the internet, but only visible to clients you approve. After you publish, add your clients to the access list so they can sign in.
Zite gives you a live URL in the format yourportal.zite.so that you can share immediately. You have several ways to distribute it:
- Copy link: Copy the link and send the URL to your clients or add it to your onboarding docs.
- Embed: Add the portal to your existing website or client-facing pages.
- QR code: Generate a scannable code so clients can open the portal on mobile instantly.
Take it a step further by connecting your own domain name (for example, clients.yourcompany.com). This makes your portal feel integrated into your brand and boosts trust with your clients.
Common mistakes to avoid when creating your client portal
Even with a powerful customer portal builder, it’s easy to ship a shiny custom client portal that clients rarely use.
Use this list of pitfalls to keep your first version intuitive and focused:
- Overcomplicating the first version: You don't need every feature on day one. Launch with core functionality like forms, project status, document sharing, and add more based on what clients actually request.
- Ignoring mobile experience: Clients will check the portal from their phones. Test on mobile before launch. If something's hard to tap or read on a small screen, fix it.
- Mixing internal and client language: Your team might call it "Phase 2 Deliverables Review." Your client just wants to know their files are ready. Audit every label and status for client-friendliness.
- Forgetting onboarding: Clients won't automatically know how to use the portal. Create a simple welcome guide or record a 2-minute walkthrough video.
Zite makes building custom client portals easier
Zite lets you describe your ideal custom client portal in plain English and turns that into a working, production-ready app. It handles the heavy lifting, like adding secure logins, database, permissions, hosting, and workflows, so you can focus on refining the client experience rather than wrestling with tech.
Here's how it helps:
- AI app generation: Write prompts stating what the portal should do, and Zite generates the pages, forms, database, and logic. You're not learning how a visual builder works or writing code.
- Built-in database with zero setup: Zite creates your data schema automatically. No need to write SQL or configure servers. The database has a spreadsheet-like interface you can directly edit.
- Authentication that just works: Adding secure logins takes one step. Magic links, Google login, and SSO are built in. It also supports granular permissions, audit logs, and is SOC 2 Type II compliant.
- Visual workflows: Set up notifications and automations through conversation. View all your workflows in the flowchart interface. No need to touch code to understand how it works.
- Full customization: Match your brand completely. Adjust layouts, colors, and typography without touching CSS. Your portal looks like yours, not like a generic template.
- No per-user pricing surprises: Add as many clients as you need. Zite doesn't charge per seat, so your costs stay predictable as you grow.
If you haven't tried it yet, sign up for Zite and build your custom client portal today.
Frequently asked questions
How long does it take to build a client portal in Zite?
Building a client portal in Zite typically takes about 45–60 minutes for an app with logins, integrations, data storage, and workflows. Zite generates the app in minutes, and you spend the rest adding features and customizing the app.
What's the hardest part of building a client portal?
The hardest part of building a client portal is deciding what features to include. Zite handles most of the technical work for you, so the real challenge is resisting the urge to add every feature you can think of. Start minimal, get client feedback, then expand based on actual needs.
Do I need coding skills to build a client portal in Zite?
No. You do not need coding skills to build a client portal in Zite. If you can explain what you want in plain English, Zite generates pages, a database, and workflows for you.
Can I connect my existing client data to a Zite portal?
Yes. You can connect your existing client data to a Zite portal by importing it from tools like Airtable or Google Sheets, or by loading exports from other systems into Zite’s built-in database. That way, the portal can sit on top of the client records you already maintain.