
After building customer portals in Zite for support and ops teams, this is the exact process I use to create a secure portal with logins, data, and workflows in under an hour.
What is a customer portal?
A customer portal is a secure, login-only section of your website or app where customers can access personalized information and self-service features. It allows users to manage their requests, view personalized content, and interact with support resources.
Every customer portal is different, but if you’re like me and want to empower your customers, it should let users submit support tickets, track requests, and access a knowledge base.
What you'll need before starting
Prerequisites:
- Zite account: You’ll need to create a free Zite account or log in to your existing account.
- Content for self-service: Gather any content you want to include, such as FAQ answers or knowledge base links.
- Technical requirements: All you need is a web browser and an internet connection. Zite runs entirely in the browser, so you don’t need special hardware or a programming environment.
Time required: Approximately 45–60 minutes. Zite can generate the core of the portal in a few minutes. We’ll spend the remainder of the time fine-tuning it by configuring login, workflows, and adding your branding.
How to create a customer portal in Zite: Step-by-step
Follow these steps to build your support customer portal from scratch using Zite.
Step 1: Start a new app and describe your portal
Log in to your Zite account and click Create, then select Zite from the dropdown. Zite will prompt you to describe your portal in your own words. Its AI reads your instructions and builds app components around your requirements. You don’t need templates or code.
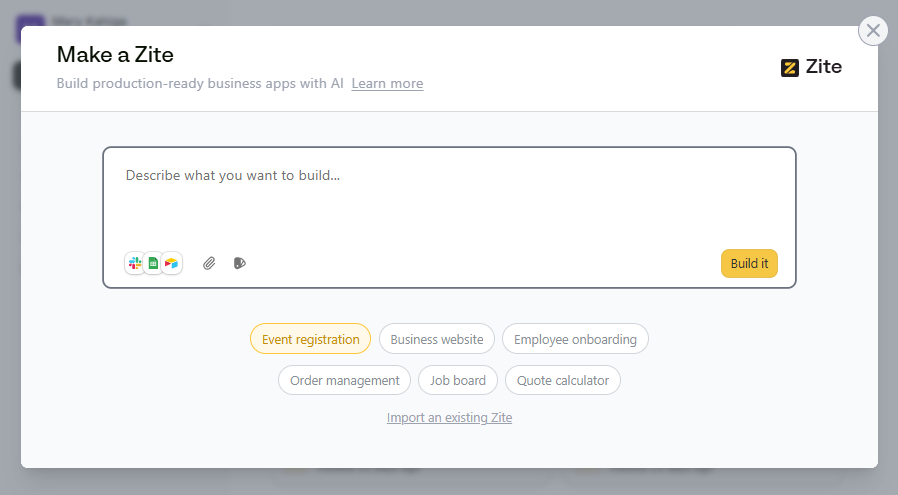
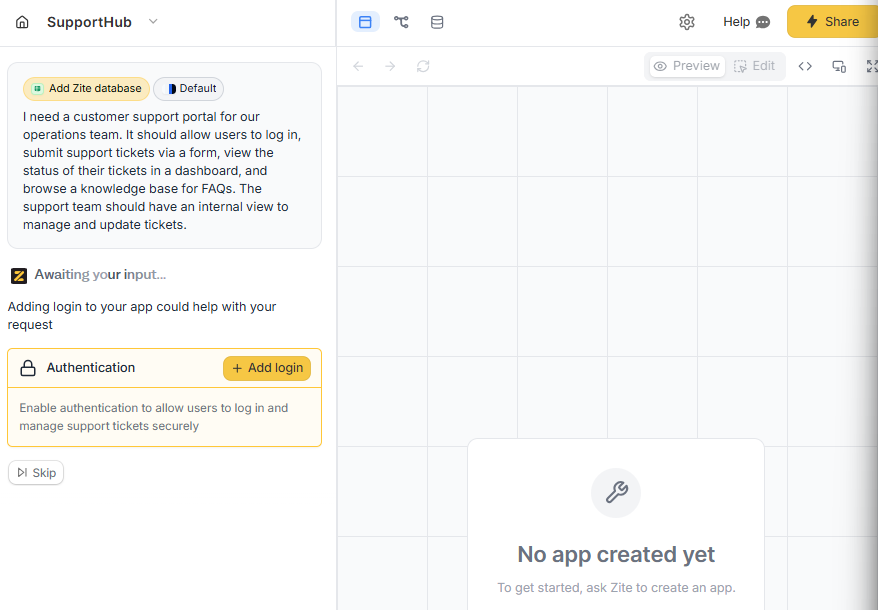
In the prompt box, type a description of your support portal. Be specific about the features you want.
For example, you might write: “Create a customer support portal for our operations team. It should allow users to log in, submit support tickets via a form, view the status of their tickets in a dashboard, and browse a knowledge base for FAQs. The support team should have an internal view to manage and update tickets.”
Then click Build it.
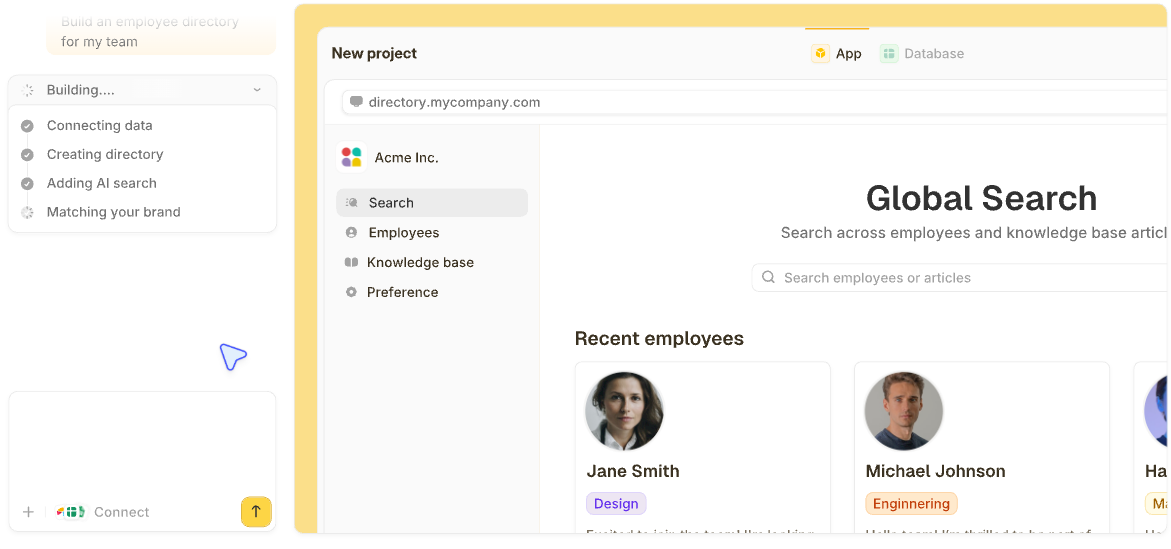
Zite will generate a working prototype of your portal, including pages and forms based on your prompt. You’ll see a live app preview on the screen, ready to refine.
Step 2: Set up your database
Every portal needs a place to store and retrieve data. Setting up a database establishes a single source of truth for all support tickets.
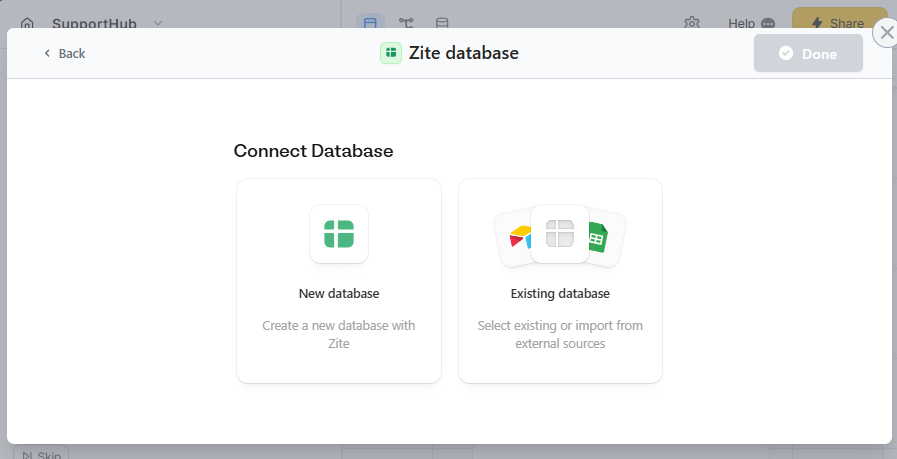
When Zite prompts you to connect a database, choose one of the following options:
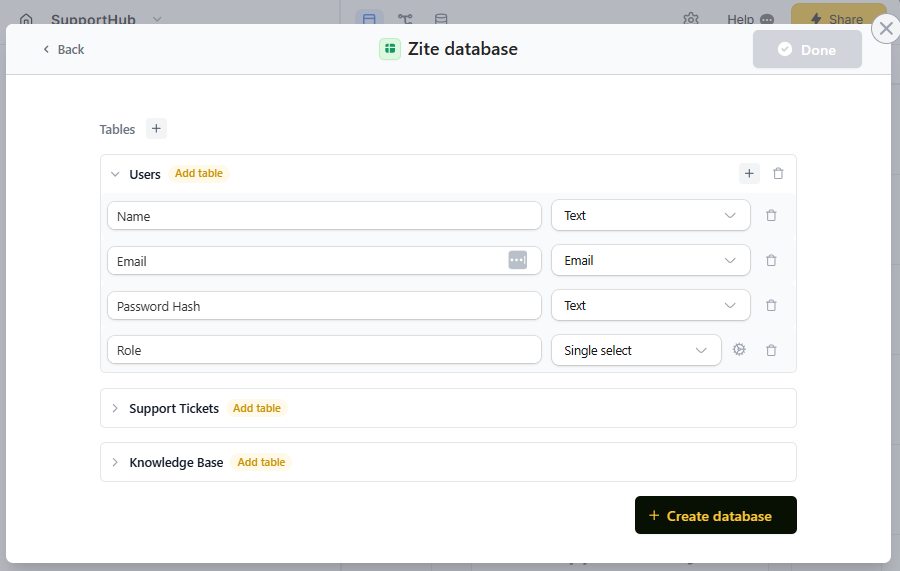
- New database: Zite instantly creates all necessary tables and fields based on your description. This is the easiest option for a new portal. Zite will auto-generate your data schema using its built-in database. No need for SQL or external databases.
- Existing database: Connect an existing data source. Zite supports native integrations with tools like Airtable and Google Sheets.
Since this portal is brand new and doesn’t have historical data, we’ll use Zite’s built-in database.
Step 3: Add secure user login and access control
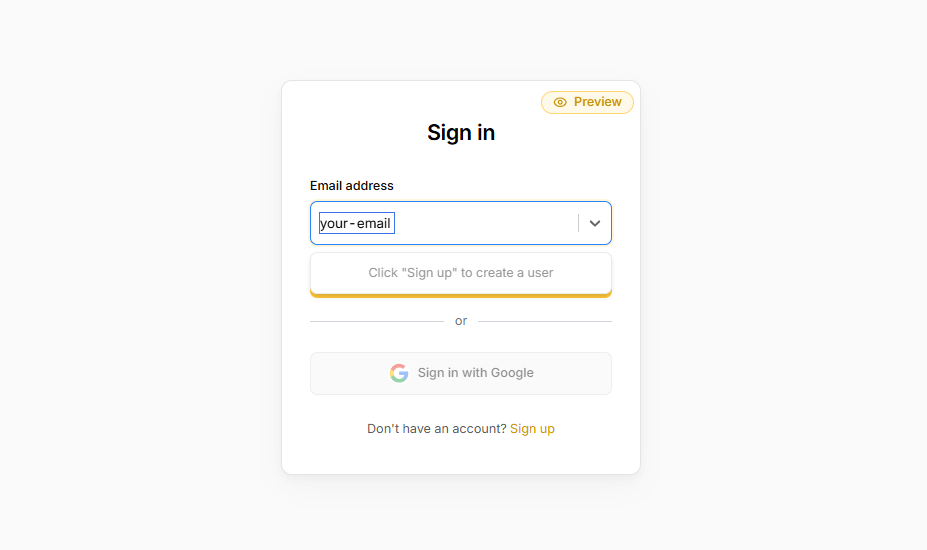
Now that your app structure and database are in place, it’s time to secure the portal with a login screen. This will ensure that only authorized customers can view their data. Zite makes it very simple to add authentication.
Simply instruct Zite to add a user login, and the platform will guide you through setting up secure authentication for your portal:
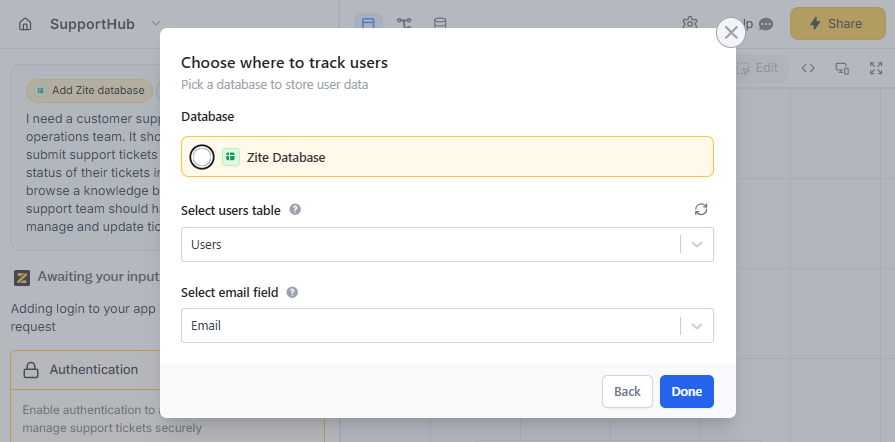
- Choose your user database: Select where Zite should store user accounts. Since we’re using the built-in database, choose Zite Database and confirm the default Users table.
- Configure access settings: Once Zite adds authentication, open the Login settings at the top of the editor. From here, you can control:
- Login methods: Zite supports passwordless Magic Link login and OAuth with Google accounts. You can also set up SSO if you’re on the enterprise plan.
- Who can sign up: Decide how users get accounts. You can select anyone can sign up, invite-only, or only allowed domains.
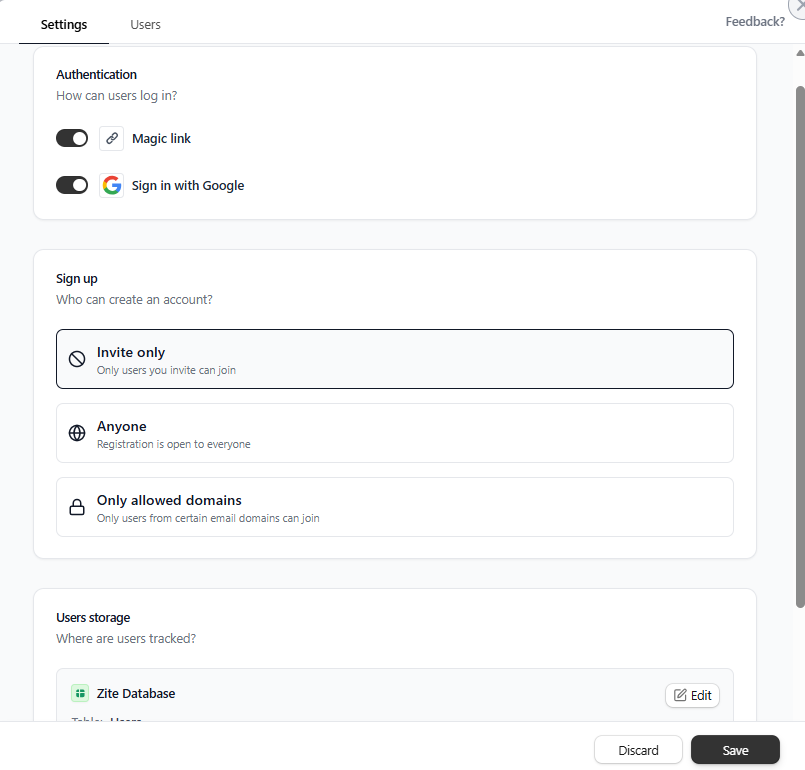
For a support portal, invite-only access is usually the best option. You can create accounts for customers who need access while keeping the portal private.
Step 4: Customize your portal pages and forms
With the core app generated and login enabled, you can refine the portal’s interface and content.
At this stage, it helps to test the portal as both a customer and a support team member. This will help you spot gaps early. For example, customers should be able to submit and track tickets, while support agents need access to the support dashboard and the ability to update ticket statuses.
Zite makes these adjustments straightforward. If you’re not sure how to handle something, switch to chat mode and ask Zite. It responds based on your existing app and suggests a prompt to apply the fix.
In this case, Zite suggested setting all new users to a User role by default, then add controls on the admin page to change a user’s role when needed.
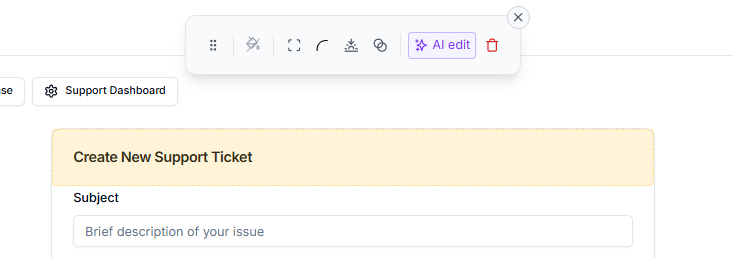
Finally, polish the design to match your brand. You can use more prompts or use Zite’s design mode to update colors and fonts.
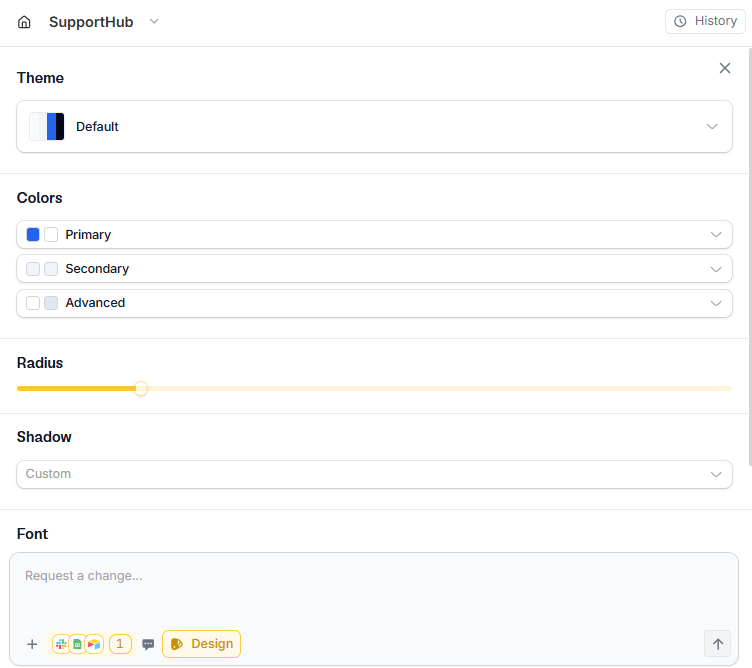
It also has an edit tool for making selective edits to the UI.
Step 5: Add Workflows for notifications and automation
Next, set up automated workflows that trigger on certain events.
For example, you’ll likely want:
- A Slack message sent to the support team when a new ticket is submitted
- A confirmation email sent to the customer after submission
You can set this up either through Zite’s chat interface or the visual workflow editor.
Option 1: Use chat to create workflows
Type a prompt like:
“Notify my team on Slack when a new ticket is created.”
Zite will guide you through connecting Slack and selecting the channel (for example, #support-team).
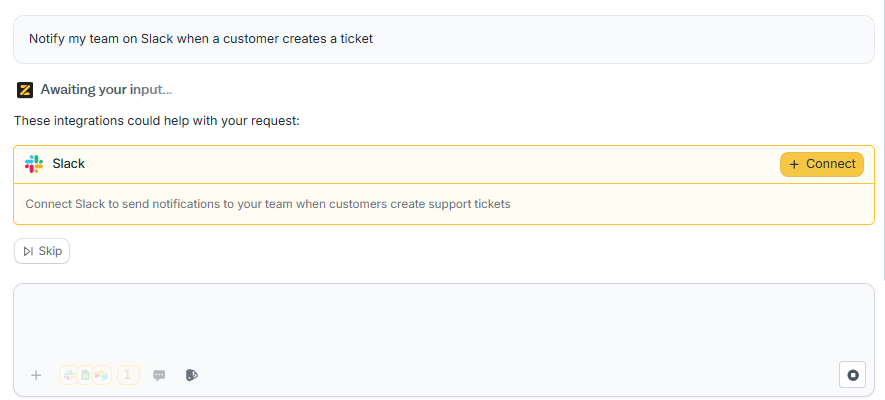
Once connected, the workflow will trigger automatically when customers submit new tickets.
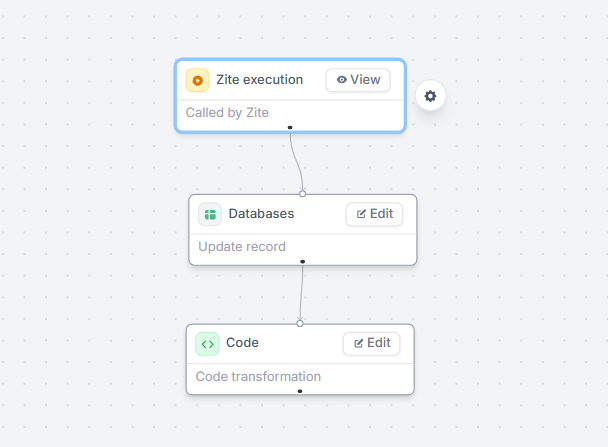
Option 2: Use the visual workflow editor
If you prefer more control, open Zite’s visual workflow editor. Here, you can explicitly define:
- The trigger (for example, when a new ticket is created)
- The action (send a Slack message, send an email, update a record)
This option is helpful when you want to add conditions or chain multiple steps together, like sending different notifications based on ticket priority.
Workflows aren’t limited to notifications. You can also:
- Set a default ticket status to Open when a ticket is created
- Automatically assign tickets to a support agent
- Send a closure email when a ticket status changes to Resolved
Step 6: Test and launch your portal
Test the portal from both perspectives:
- Customer: Log in, submit a ticket, and confirm it appears correctly.
- Support team: View tickets, update statuses, and confirm notifications trigger as expected.
Once everything works, publish the portal. In the Zite builder, click Share or Publish to push the app live. You’ll get a shareable URL, usually in the format yourapp.zite.so.
You can also configure a custom domain, such as support.yourcompany.com, and point it to your Zite portal.
Common mistakes to avoid
Even with a straightforward builder like Zite, there are a few pitfalls to watch out for.
Here are some common mistakes and how to avoid them:
- Over-notifying your team: If every update sends a notification, people start muting channels. That defeats the whole point. Notify only on events that require action.
- Ignoring user feedback and testing: Tight deadlines or overconfidence in the initial build can lead to skipping thorough testing. Solicit feedback from a few customers or colleagues by running a pilot.
- Designing for your team, not your customers: This happens when internal workflows leak into the customer experience. Customers see fields, statuses, or language that only make sense to your support team, which creates confusion and extra questions. To avoid this, separate customer-facing views from internal views early.
Taking it further
If you’ve got the basics down and want to enhance your customer portal even more, here are some ideas:
- Single Sign-On (SSO) integration: For an enterprise environment, integrate SSO so they can log in with their company credentials. Zite supports SSO out of the box.
- Workflow extensions: Use OpenAI integration to add functionality like automatically drafting an initial response using GPT for certain queries.
Zite makes it easier to build a customer portal
Zite significantly lowers both the technical barrier and the time required to build a customer portal. What would normally require a full-stack developer and multiple tools, you can do in under an hour.
Here’s how it helps:
- AI-driven app creation: Describe the portal in plain language, and Zite generates the core app with pages, forms, and a database. It often adds sections you’d otherwise forget.
- Built-in database and integrations: There’s no need to configure servers or write SQL. Zite’s built-in database auto-generates your data models and scales as your usage grows. You can also connect existing tools like Airtable or Google Sheets.
- Production-ready: Adding login is a single step. Zite handles authentication, user management, and SSO, with enterprise-grade security like SOC 2 compliance and audit logs already in place.
- No-code workflows: Notifications and automations are easy to set up through chat prompts or the visual workflow editor.
- Customization and branding: You can tailor the portal to match your brand without touching CSS. Layout, colors, fonts, and navigation are easy to adjust.
- Cost and scalability: Zite doesn’t charge per user, so you can support as many customers as you need without worrying about surprise costs as you grow.
If you haven’t already, sign up for Zite and start building your customer portal today. Most features are available on the free tier, so you can prototype your portal without commitment.
Frequently asked questions
How long does it take to create a customer portal in Zite?
Creating a customer portal in Zite takes about 45–60 minutes for a production-ready setup. Zite generates the initial app in a few minutes, and the remaining time goes into fine-tuning functionality and branding.
What’s the hardest part of building a customer portal in Zite?
The hardest part of building a customer portal in Zite is deciding what to include, not the technical setup. Because Zite can generate a lot very quickly, it’s easy to overbuild. The key challenge is staying focused on the features your customers and support team actually need.
Do I need programming skills or a developer to create a portal in Zite?
No, you don’t need any programming skills or a developer to create a portal in Zite. Everything is handled through natural language and a visual interface.
Can Zite help me automate my support workflows, not just build the portal UI?
Yes, Zite can automate support workflows in addition to building the portal UI. It supports notifications, record updates, and conditional logic through chat prompts or a visual workflow editor, such as sending Slack alerts when new tickets are submitted.
What if I already have a system (or data) for support tickets? Can I integrate it with Zite?
Yes, you can integrate existing support ticket systems or data with Zite. You can either connect external data sources like Airtable or Google Sheets directly, or export your data and import it into Zite’s built-in database.